Make a simple CRUD with Laravel 8
In this tutorial we are going to learn how to make a simple CRUD with Laravel 8 and TailwindCSS.

Table of contents
Introduction
Laravel is a web application framework with expressive, elegant syntax. An awesome tool for building web apps. Tailwindcss is a utility-first CSS framework packed with many classes that can be composed to build any design, directly in your markup. In this tutorial we are going to use those tools to build a simple CRUD. If you are not familiar with this term CRUD simply means create, read, update, and delete which are the four basic operations of persistent storage.
Overview
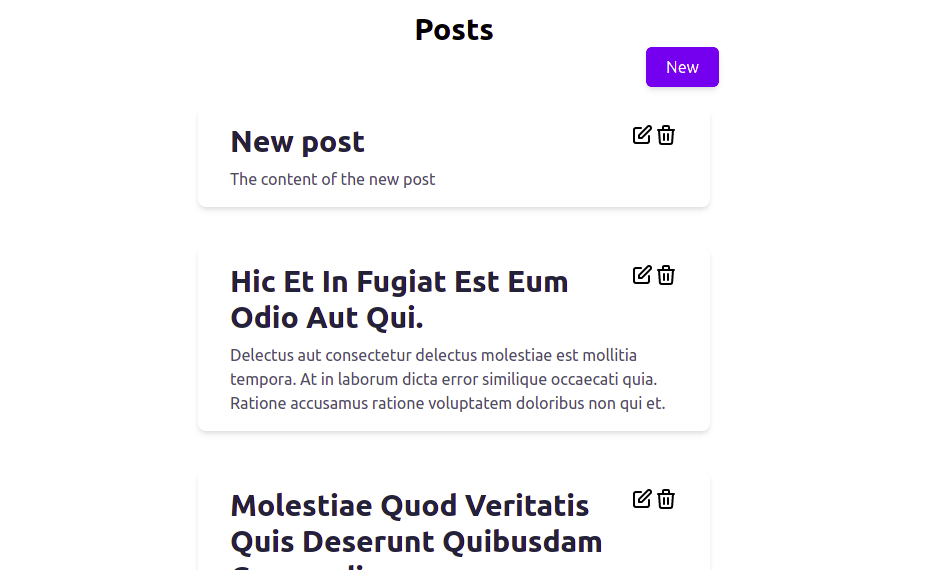
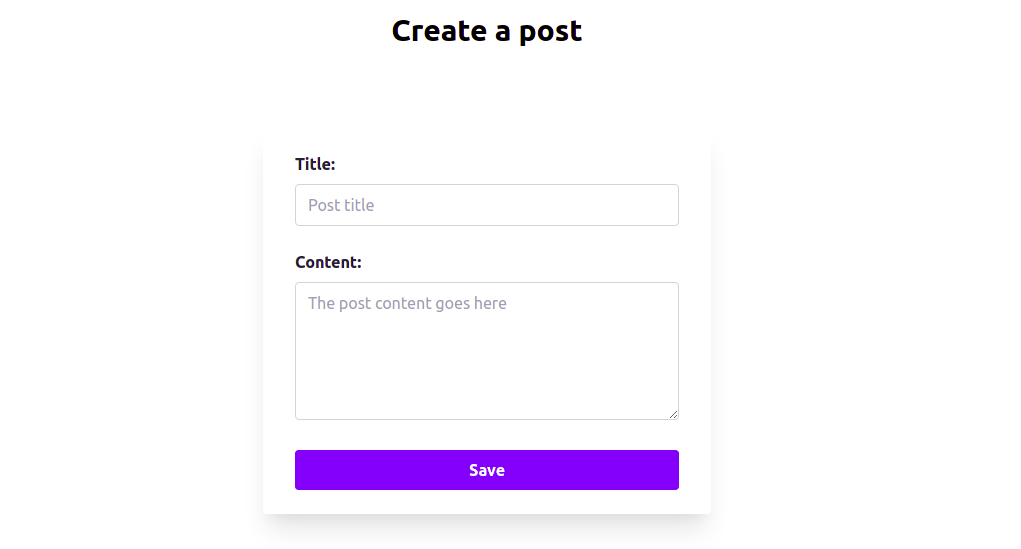
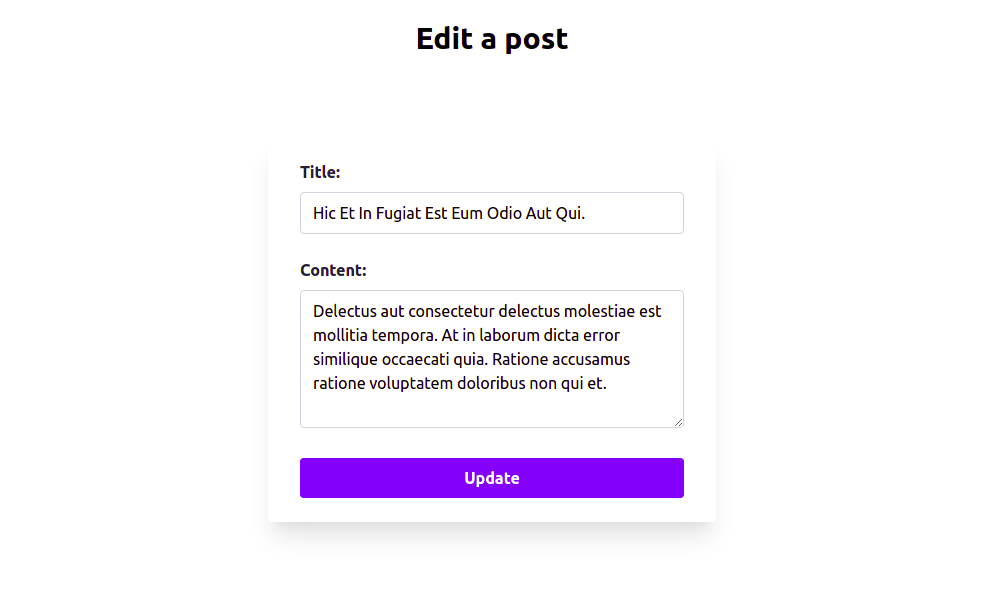
Some screenshots of what we are going to build.
posts list
create post form
edit post form
Prerequisite
I suppose that you already have PHP, Composer and a DBMS like MYSQL in your pc. I also suppose that you have basic knowledge in Laravel.
Set up our project
The first thing we need is to create a new laravel project. It is pretty simple, open your terminal and type the command below:
composer create-project laravel/laravel laravel8-crud
After that, open the project folder with your favorite IDE or code editor and edit the .env file by filling your database name and credentials.
DB_DATABASE=laravel8crud
DB_USERNAME=root
DB_PASSWORD=
We are ready to go. After setting the database credentials, we need to create a table and fill it with some dummy data is the model and migration. Let's create a model called Post and its migration file.
Database
Create a Post model and its migration with this command.
php artisan make:model Post -m
When we type the command above, Laravel create two files. The first one is Post.php.
Model and migration
App/Models/Post.php
<?php

namespace App\Models;

use Illuminate\Database\Eloquent\Factories\HasFactory;
use Illuminate\Database\Eloquent\Model;

class Post extends Model
{
    use HasFactory;
}
A little update in the Post.php file is needed to say Laravel which posts table's column the user is able to modify.
App/Models/Post.php
<?php

namespace App\Models;

use Illuminate\Database\Eloquent\Factories\HasFactory;
use Illuminate\Database\Eloquent\Model;

class Post extends Model
{
    use HasFactory;
    protected $fillable = ['title', 'content'];
}
The second file is something like xxxx_xx_xx_xxxxxx_create_posts_table.php
database/migrations/xxxx_xx_xx_xxxxxx_create_posts_table.php
<?php

use Illuminate\Database\Migrations\Migration;
use Illuminate\Database\Schema\Blueprint;
use Illuminate\Support\Facades\Schema;

class CreatePostsTable extends Migration
{
    /**
     * Run the migrations.
     *
     * @return void
     */
    public function up()
    {
        Schema::create('posts', function (Blueprint $table) {
            $table->id();
            $table->timestamps();
        });
    }

    /**
     * Reverse the migrations.
     *
     * @return void
     */
    public function down()
    {
        Schema::dropIfExists('posts');
    }
}
This file will help us to define the structure of our posts table in the database. We are going to fill it to match our needs. One post will have a title and a content. Update the file content with the code below.
database/migrations/xxxx_xx_xx_xxxxxx_create_posts_table.php
<?php

use Illuminate\Database\Migrations\Migration;
use Illuminate\Database\Schema\Blueprint;
use Illuminate\Support\Facades\Schema;

class CreatePostsTable extends Migration
{
    /**
     * Run the migrations.
     *
     * @return void
     */
    public function up()
    {
        Schema::create('posts', function (Blueprint $table) {
            $table->id();
            $table->string('title');
            $table->text('content');
            $table->timestamps();
        });
    }

    /**
     * Reverse the migrations.
     *
     * @return void
     */
    public function down()
    {
        Schema::dropIfExists('posts');
    }
}
Let's move on and create some dummy posts with factories and seeders.
Dummy data
To create a factory, just type the command below command inside your project.
php artisan make:factory PostFactory -m Post
We use -m Post to tell Laravel to generate a factory for our Post model. Update its contains with the code below.
database/factories/PostFactory.php
<?php

namespace Database\Factories;

use App\Models\Post;
use Illuminate\Support\Str;
use Illuminate\Database\Eloquent\Factories\Factory;

class PostFactory extends Factory
{
    /**
     * The name of the factory's corresponding model.
     *
     * @var string
     */
    protected $model = Post::class;

    /**
     * Define the model's default state.
     *
     * @return array
     */
    public function definition()
    {
        return [
            'title' => Str::title($this->faker->sentence()),
            'content' => $this->faker->text()
        ];
    }
}
We use faker PHP library to generate a random text for our title and content. After the Factory, we need a Seeder to use it. The command below will do the job for us.
php artisan make:seeder PostSeeder
We have a new file inside the database/seeders folder called PostSeeder.php. Just update its contain with the code below.
database/seeders/PostSeeder.php
<?php

namespace Database\Seeders;

use App\Models\Post;
use Illuminate\Database\Seeder;

class PostSeeder extends Seeder
{
    /**
     * Run the database seeds.
     *
     * @return void
     */
    public function run()
    {
        Post::factory(15)->create();
    }
}
We are almost done with the database, all we need to do is to run our migration and seed the database with fake posts. Type the two command below and we are ready to go.
php artisan migrate
php artisan db:seed --class=PostSeeder
Now that we have our fifteen fake posts, we are going to create a controller to handle our logic.
Controller
The command below create A resource controller and also tell Laravel to fill it with our Post model.
php artisan make:controller PostController --resource -m Post
Update its contain with the code below.
App/Http/Controllers/PostController.php
<?php

namespace App\Http\Controllers;

use App\Models\Post;
use Illuminate\Http\Request;

class PostController extends Controller
{
    /**
     * Display a listing of the resource.
     *
     * @return \Illuminate\Http\Response
     */
    public function index()
    {
        $posts = Post::latest()->paginate(10);
        return view('posts.index', compact('posts'));
    }

    /**
     * Show the form for creating a new resource.
     *
     * @return \Illuminate\Http\Response
     */
    public function create()
    {
        return view('posts.create');
    }

    /**
     * Store a newly created resource in storage.
     *
     * @param  \Illuminate\Http\Request  $request
     * @return \Illuminate\Http\Response
     */
    public function store(Request $request)
    {
        $data = $request->validate([
            'title' => 'required',
            'content' => 'required'
        ]);
        Post::create($data);

        return redirect()->route('posts.index')->with('success', 'Post created successfuly!');
    }

    /**
     * Display the specified resource.
     *
     * @param  \App\Models\Post  $post
     * @return \Illuminate\Http\Response
     */
    public function show(Post $post)
    {
        return view('posts.show', compact('post'));
    }

    /**
     * Show the form for editing the specified resource.
     *
     * @param  \App\Models\Post  $post
     * @return \Illuminate\Http\Response
     */
    public function edit(Post $post)
    {
        return view('posts.edit', compact('post'));
    }

    /**
     * Update the specified resource in storage.
     *
     * @param  \Illuminate\Http\Request  $request
     * @param  \App\Models\Post  $post
     * @return \Illuminate\Http\Response
     */
    public function update(Request $request, Post $post)
    {
        $data = $request->validate([
            'title' => 'required',
            'content' => 'required'
        ]);

        $post->update($data);

        return redirect()->route('posts.index')->with('success', 'Post updated successfuly!');
    }

    /**
     * Remove the specified resource from storage.
     *
     * @param  \App\Models\Post  $post
     * @return \Illuminate\Http\Response
     */
    public function destroy(Post $post)
    {
        $post->delete();
        return redirect()->route('posts.index')->with('success', 'Post deleted successfuly!');
    }
}
Let me explain what we do in the code of the controller above. The index method stand for the page which will show the posts list. The other methods are well named so I think that we don't need more explanation.
We have finished with our controller, we can make views to finally see the result in the browser. Create two folders named layouts and posts inside the resources/views folder. In the first folder(layouts).
Views
Create a blade file named app.blade.php and fill it with the code below.
This file is our base layout, we are going to extend it and use its contain in other views. Thanks to blade, a template engine.
resources/views/layouts/app.blade.php
<!DOCTYPE html>
<html lang="{{ str_replace('_', '-', app()->getLocale()) }}">

<head>
    <meta charset="utf-8">
    <meta name="viewport" content="width=device-width, initial-scale=1">

    <title>@yield('title') - Laravel 8 CRUD</title>

    {{-- Tailwindcss --}}
    <link href="https://unpkg.com/tailwindcss@^2/dist/tailwind.min.css" rel="stylesheet">


</head>

<body>
    @yield('content')
</body>

</html>
Inside the second folder(posts), let's create a file named index.blade.php.
Fill the file with the code below. In case that you are confuse or don't understand something in this file, let me say you that it is just a loop for our posts list and a button(New) for opening the create post page.
resources/views/posts/index.blade.php
@extends('layouts.app')
@section('title', 'Posts')
@section('content')
    <h1 class="text-center text-3xl mt-5 font-bold">Posts</h1>

     <div class="max-w-md ml-auto">
        <a href="{{ route('posts.create') }}"
            class="py-2 px-5 text-white rounded-md bg-indigo-600 shadow-md block md:inline-block">New</a>
    </div>

    @if (session('success'))
        <div class="alert flex flex-row items-center bg-green-200 p-5 rounded border-b-2 border-green-300 max-w-md mx-auto">
            <div
                class="alert-icon flex items-center bg-green-100 border-2 border-green-500 justify-center h-10 w-10 flex-shrink-0 rounded-full">
                <span class="text-green-500">
                    <svg fill="currentColor" viewBox="0 0 20 20" class="h-6 w-6">
                        <path fill-rule="evenodd"
                            d="M16.707 5.293a1 1 0 010 1.414l-8 8a1 1 0 01-1.414 0l-4-4a1 1 0 011.414-1.414L8 12.586l7.293-7.293a1 1 0 011.414 0z"
                            clip-rule="evenodd"></path>
                    </svg>
                </span>
            </div>
            <div class="alert-content ml-4">
                <div class="alert-title font-semibold text-lg text-green-800">
                    Success
                </div>
                <div class="alert-description text-sm text-green-600">
                    {{ session('success') }}
                </div>
            </div>
        </div>
    @endif

    <div class="flex flex-col justify-center items-center">
        @foreach ($posts as $post)
            <div class="w-full px-8 py-4 max-w-lg bg-white shadow-md rounded-lg my-5">
                <div class="flex justify-between">
                    <h2 class="text-gray-800 text-3xl font-semibold"><a
                            href="{{ route('posts.show', $post) }}">{{ $post->title }}</a></h2>
                    <div class="flex">
                        <a href="{{ route('posts.edit', $post) }}">
                            <svg xmlns="http://www.w3.org/2000/svg" class="h-6 w-6" fill="none" viewBox="0 0 24 24"
                                stroke="currentColor">
                                <path stroke-linecap="round" stroke-linejoin="round" stroke-width="2"
                                    d="M11 5H6a2 2 0 00-2 2v11a2 2 0 002 2h11a2 2 0 002-2v-5m-1.414-9.414a2 2 0 112.828 2.828L11.828 15H9v-2.828l8.586-8.586z" />
                            </svg>
                        </a>
                        <form action="{{ route('posts.destroy', $post) }}" method="POST">
                            @csrf
                            @method('DELETE')
                            <button type="submit">
                                <svg xmlns="http://www.w3.org/2000/svg" class="h-6 w-6" fill="none"
                                    viewBox="0 0 24 24" stroke="currentColor">
                                    <path stroke-linecap="round" stroke-linejoin="round" stroke-width="2"
                                        d="M19 7l-.867 12.142A2 2 0 0116.138 21H7.862a2 2 0 01-1.995-1.858L5 7m5 4v6m4-6v6m1-10V4a1 1 0 00-1-1h-4a1 1 0 00-1 1v3M4 7h16" />
                                </svg>
                            </button>
                        </form>
                    </div>
                </div>
                <p class="mt-2 text-gray-600">{{ $post->content }}</p>
            </div>
        @endforeach
        <div>
            {{ $posts->links() }}
        </div>
    </div>

@endsection
Now that our list of posts is ready, we are going to make a page and add form inside it. The form will help us create new posts.
resources/views/create.blade.php
@extends('layouts.app')
@section('title', 'Create post')
@section('content')
    <h1 class="text-center text-3xl mt-5 font-bold">Create a post</h1>
    <div class="max-w-md mx-auto">
        <div class="py-6 px-8 mt-20 bg-white rounded shadow-xl">
            <form action="{{ route('posts.store') }}" method="POST">
                @csrf
                <div class="mb-6">
                    <label for="name" class="block text-gray-800 font-bold">Title:</label>
                    <input type="text" name="title" id="name" value="{{ old('title') }}" placeholder="Post title"
                        class="w-full border border-gray-300 py-2 pl-3 rounded mt-2 outline-none focus:ring-indigo-600 :ring-indigo-600" />
                    @error('title')
                        <p class="text-sm text-red-500 mt-2">{{ $message }}</p>
                    @enderror
                </div>

                <div class="mb-6">
                    <label for="name" class="block text-gray-800 font-bold">Content:</label>
                    <textarea name="content" id="content"
                        class="w-full border border-gray-300 py-2 pl-3 rounded mt-2 outline-none focus:ring-indigo-600 :ring-indigo-600"
                        placeholder="The post content goes here" rows="5">{{ old('content') }}</textarea>
                    @error('content')
                        <p class="text-sm text-red-500 mt-2">{{ $message }}</p>
                    @enderror
                </div>

                <button type="submit"
                    class="cursor-pointer py-2 px-4 block mt-6 bg-indigo-500 text-white font-bold w-full text-center rounded">
                    Save</button>
            </form>
        </div>
    </div>
@endsection
We need a similar form to edit our posts.
resources/views/posts/edit.blade.php
@extends('layouts.app')
@section('title', 'Edit post')
@section('content')
    <h1 class="text-center text-3xl mt-5 font-bold">Edit a post</h1>
    <div class="max-w-md mx-auto">
        <div class="py-6 px-8 mt-20 bg-white rounded shadow-xl">
            <form action="{{ route('posts.update', $post) }}" method="POST">
                @csrf
                <div class="mb-6">
                    <label for="name" class="block text-gray-800 font-bold">Title:</label>
                    <input type="text" name="title" id="name" value="{{ old('title', $post->title) }}"
                        placeholder="Post title"
                        class="w-full border border-gray-300 py-2 pl-3 rounded mt-2 outline-none focus:ring-indigo-600 :ring-indigo-600" />
                    @error('title')
                        <p class="text-sm text-red-500 mt-2">{{ $message }}</p>
                    @enderror
                </div>

                <div class="mb-6">
                    <label for="name" class="block text-gray-800 font-bold">Content:</label>
                    <textarea name="content" id="content"
                        class="w-full border border-gray-300 py-2 pl-3 rounded mt-2 outline-none focus:ring-indigo-600 :ring-indigo-600"
                        placeholder="The post content goes here" rows="5">{{ old('content', $post->content) }}</textarea>
                    @error('content')
                        <p class="text-sm text-red-500 mt-2">{{ $message }}</p>
                    @enderror
                </div>

                <button type="submit"
                    class="cursor-pointer py-2 px-4 block mt-6 bg-indigo-500 text-white font-bold w-full text-center rounded">
                    Update</button>
            </form>
        </div>
    </div>
@endsection
Well, our views are ready, the final touch are routes.
Routes
Update the routes/web.php file.
<?php

use App\Http\Controllers\PostController;
use Illuminate\Support\Facades\Route;

/*
|--------------------------------------------------------------------------
| Web Routes
|--------------------------------------------------------------------------
|
| Here is where you can register web routes for your application. These
| routes are loaded by the RouteServiceProvider within a group which
| contains the "web" middleware group. Now create something great!
|
*/

Route::get('/', function () {
    return view('welcome');
});
Route::resource('posts', PostController::class);
Type this command in your terminal inside your project folder. Open your browser, navigate to http://127.0.0.1:8000/posts and enjoy your application!
php artisan serve
Conclusion
In this post I wanted to show you how it is pretty simple to make a CRUD with Laravel 8 and Tailwindcss, two great tools to make modern web applications. It is true that we can improve our app by adding more functionnality like confirmation before deleting post or notifications with a Javascript library such as toast but it was not the objective. We will do it in another post. Hope that you found it useful.
